Weaving How To: Keep Your Sides Straight
How to Weave Straight Edges Like a Pro
Hi friends!
I often get students who are frustrated by this, and even though I cover it in my beginning weaving video class, I decided to publish a public tutorial as well. The secret is 3 words: BUBBLE, STRUM and BEAT. Do you have issues keeping your weaving sides straight? Do you find that the sides of your weavings keep pulling in?
I get these questions from fellow weavers all the time and I have found that everyone, no matter what your skill level, struggles with this problem from time to time. I have found that when most people start out weaving, they pull the weft thread through too tight than previous rows. Doing this tends to pull on the warp threads on the ends of your weavings and pulls your rows which makes your sides not straight. I have been weaving for awhile, but I still have to stay conscious about how much tension I have when I weave.
When you are ready to learn more, click the link below for more information on all my video classes! Tutorial continues below!

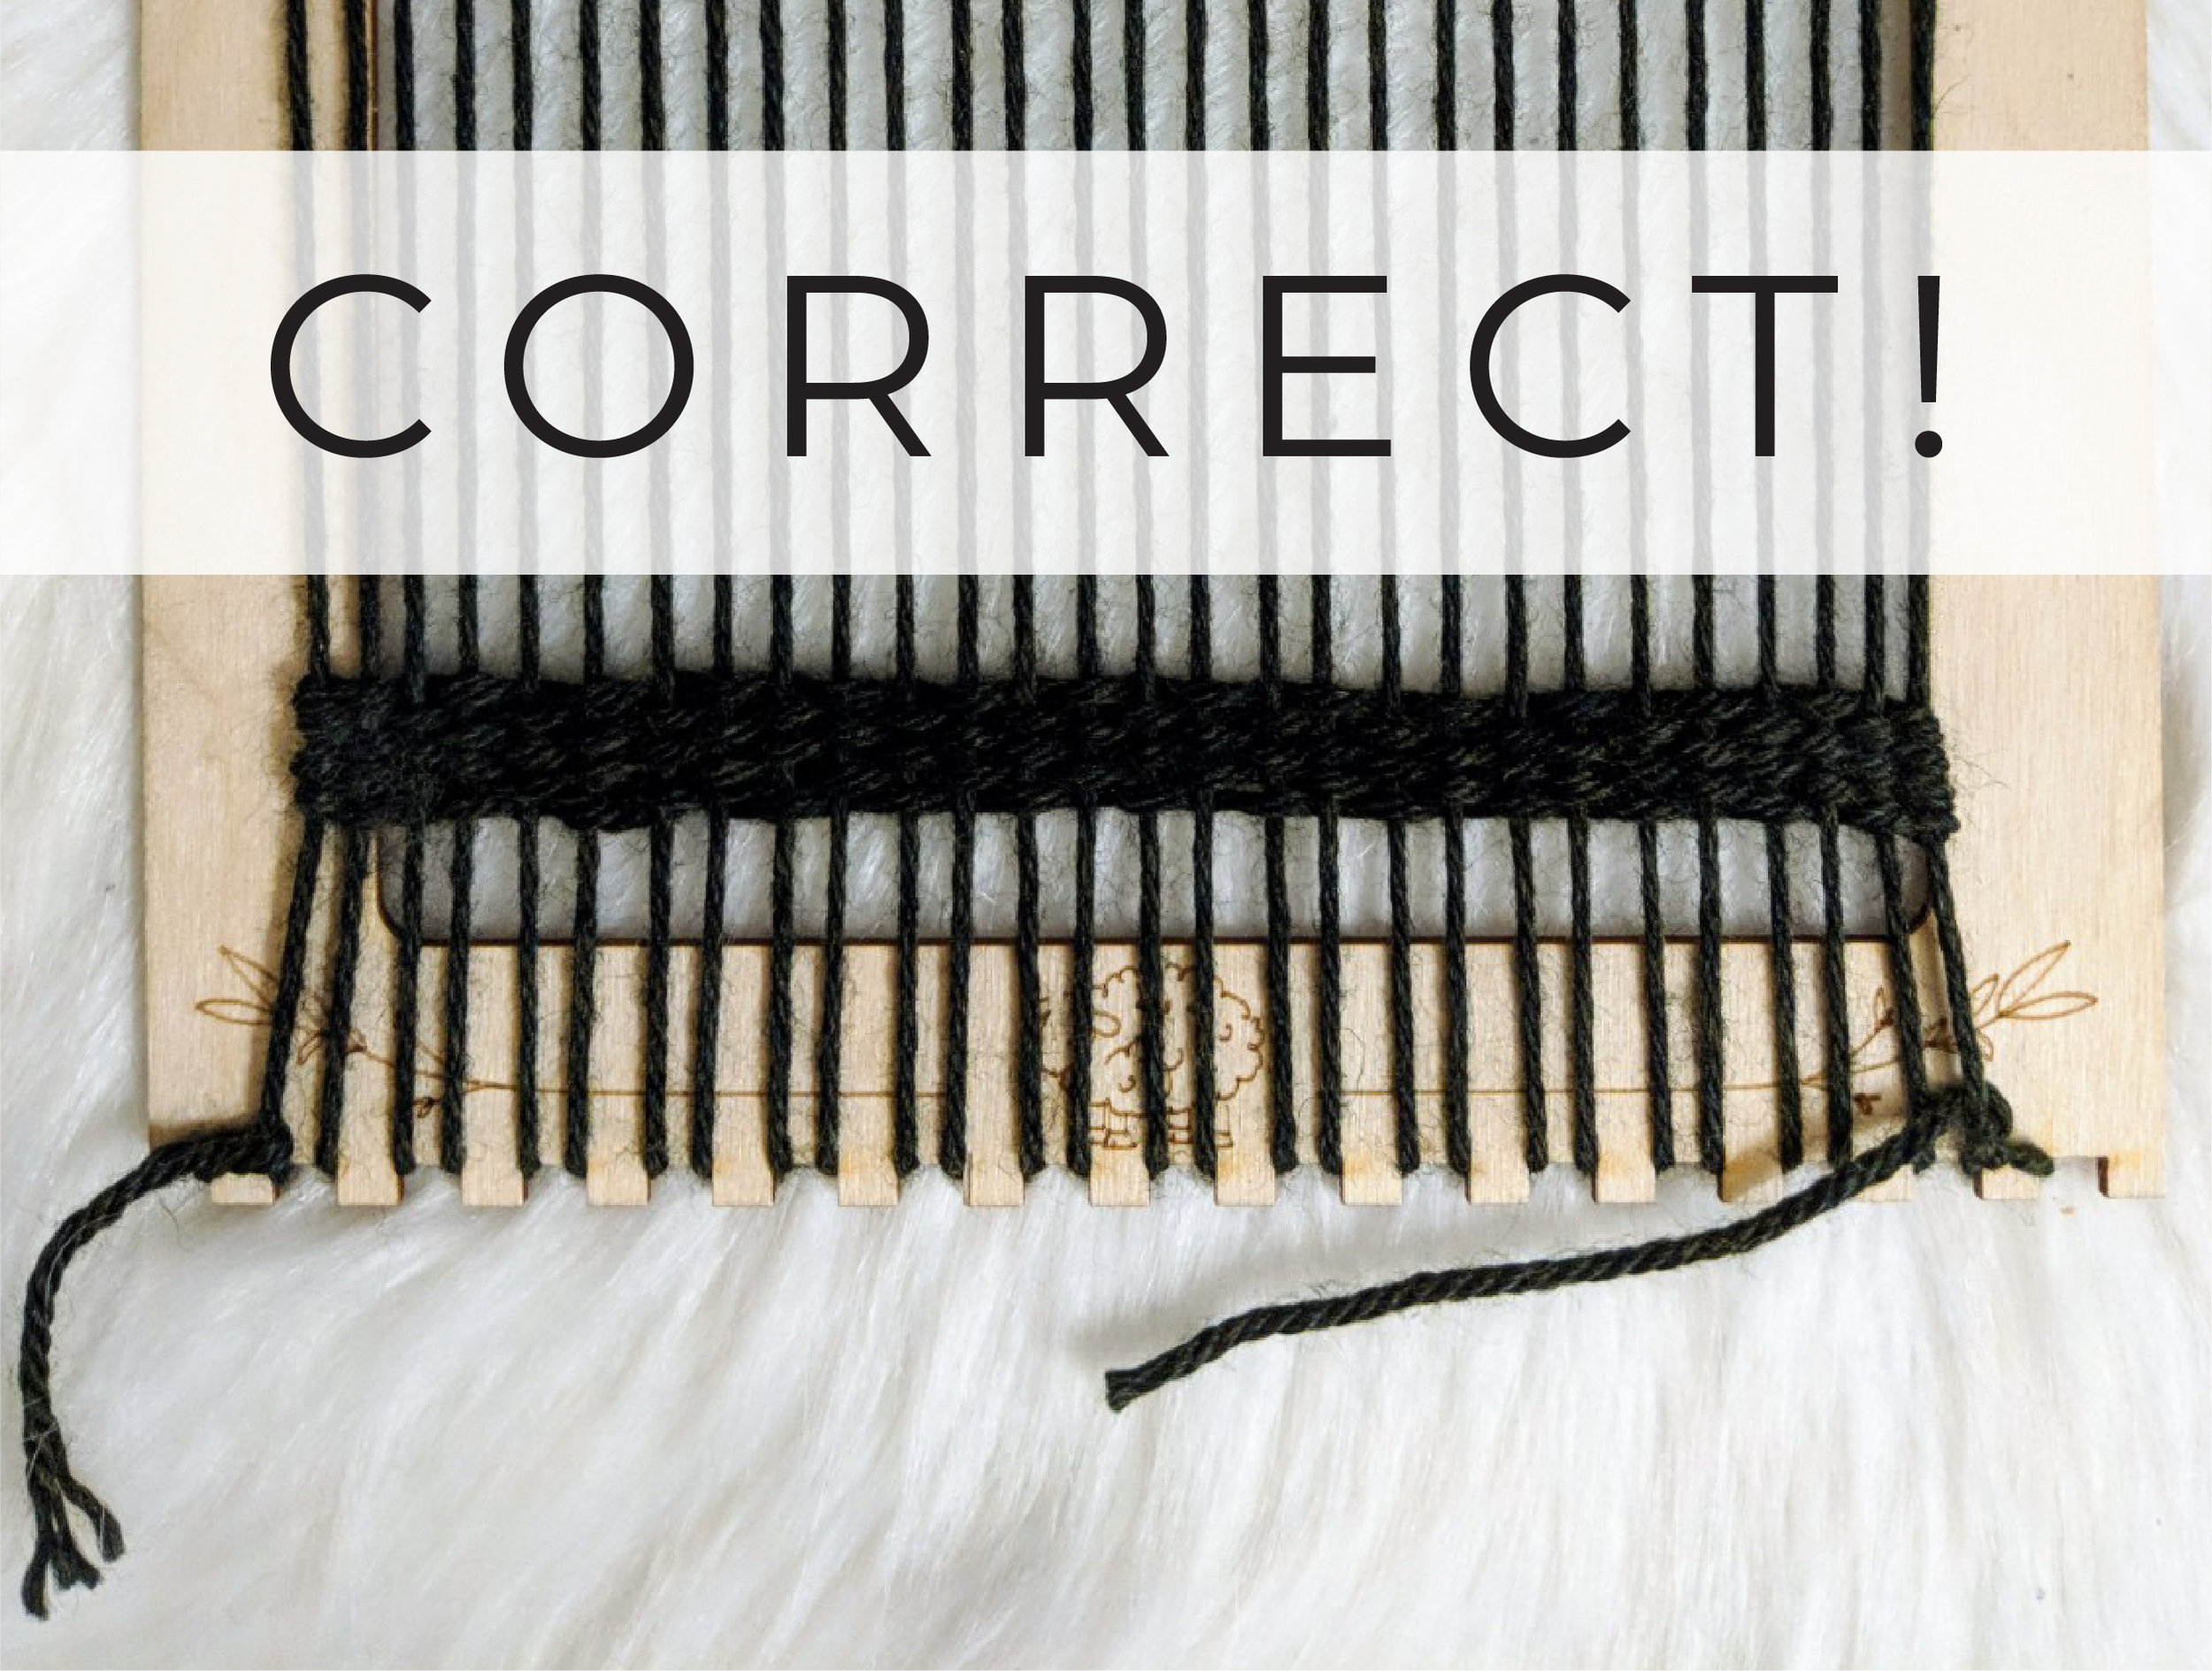
Below is an example of what your weaving would look like when you weave too tight and example of how your weaving edges should look.

If you follow the three steps below, you will be able to create clean, straight edges in every one of your weavings. Repeat to yourself ‘bubble, strum and beat’ until it becomes second nature!
STEP 1. When threading the warp threads, create a slight dome shape with the yarn, making sure that your yarn stays loose.It is important to make sure the yarn is not pulled too tight.

STEP 2. BUBBLE. Use your finger to push down the center of the dome onto the rest of the weaving. Your yarn should look like it has “bubbles, rainbows, hills or mounds” (however you want to think of them.) Now use the back of your fingers to STRUM across the width of your warp strings above the bubbles, like you are strumming guitar. This step is like magic and it settles your weft into the warp strings, over and under.

STEP 3. BEAT. Pull down the other two mini domes that are left. Make sure not to pull on the end of the warp thread at all during this process. It also helps to beat down a small section, such as the first inch on the side you are weaving from (the side where the weft loops around the last warp string, not the side with the tail) to make sure it is aligned straight above the sides below it, before moving on to beat down the rest of the row. Then use a fork or a weaving comb to beat down the row.

Completing these steps with each row will give your weaving the perfect tension and stop the edges being too tight and creeping inwards. If you would like to learn more, take a look at my weaving classes. I offer classes at all skill levels and would love to help you grow as a weaver.
Happy weaving, everyone!