How to fill out your tassels.

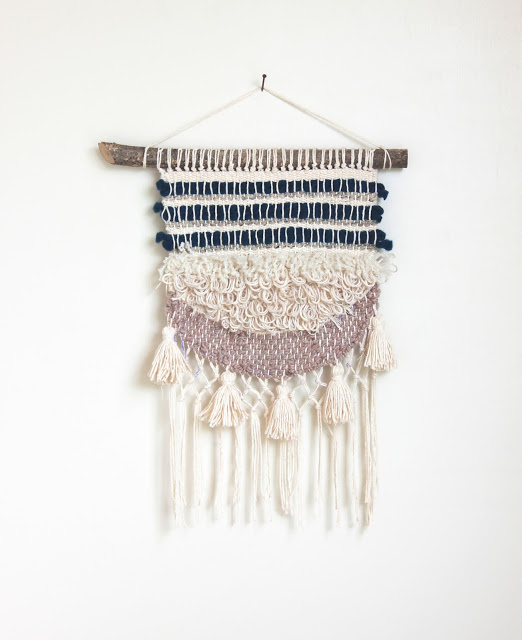
Sometimes I like to add a little something besides fringe to the bottom of my tapestries. Especially if the piece doesn't have any fringe already, like my Arizona sunset weave above. I learned very quickly that the big, beautiful tassels you see don't happen automatically unless you use a loose spun fiber such as roving.
The key to a great tassel is that most of the volume has to happen under the band. If you use the same amount of yarn in the cap as you do the skirt, chances are your tassel will have an 'athletic build' and be pretty much straight up and down.... but I'll share my secret with you!
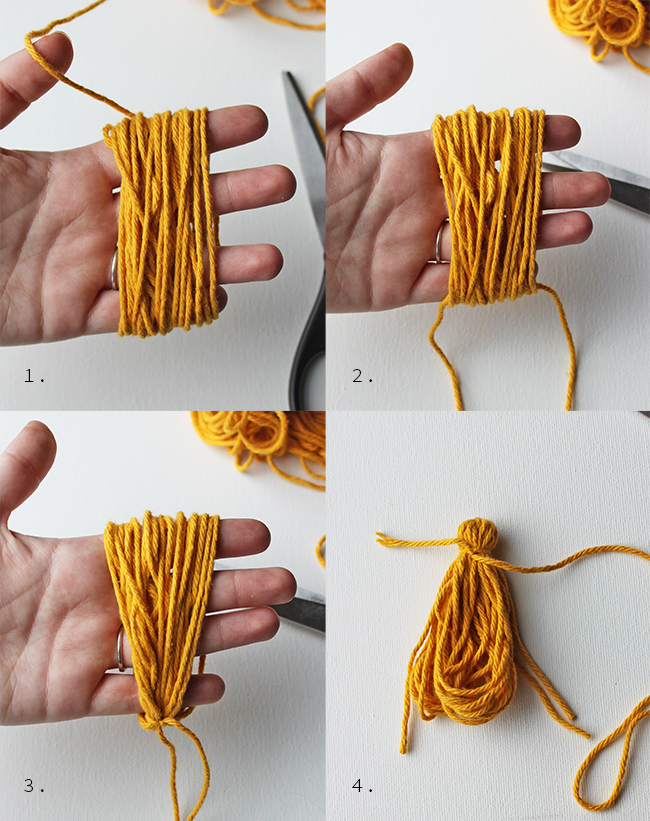
1. Wrap yarn around your hand about 20 times, beginning and ending at the top.
2. Cut a 10" piece of yarn and slide it through the top of your tassel (the bottom of your hand).
3. Double knot the yarn to hold your tassel into place and then take it off your hand.
4. Cut another 10" piece of yarn and tie it about half an inch from the top of your tassel so that one end of the knot is much longer than the other.

5. Wrap the long end of your yarn around the tassel 5-6 times to create the band. Use a needle to pull the end down through the band to secure.
6. Cut the loops at the bottom and trim the tassel to the desired length.
7. This is a normal tassel. If you like the look, then you're done! If you want to fill it out, keep reading.
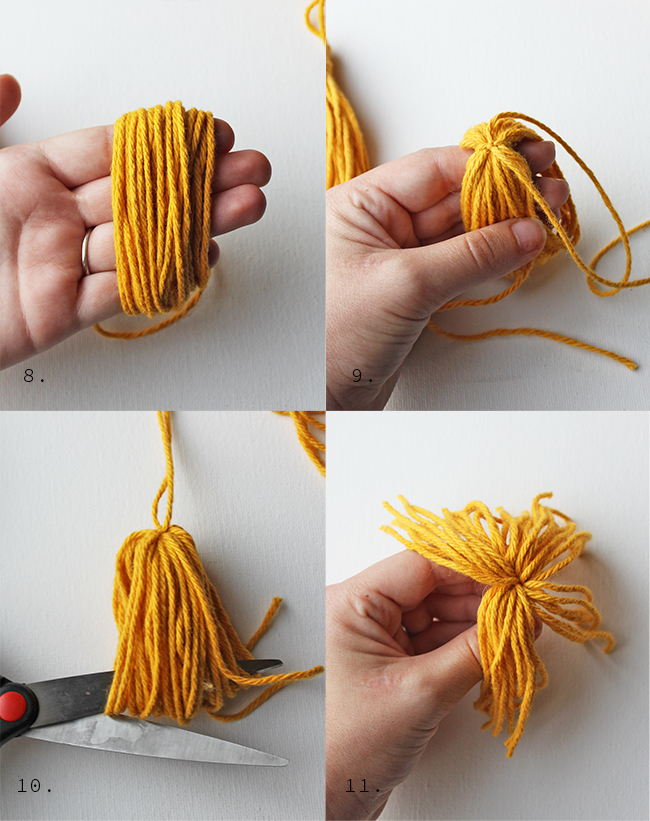
8. Repeat the first two steps of a regular tassel. Begin by wrapping yarn around your fingers 25-30 times.
9. Use a 10" piece of yarn to double knot the top of your tassel together so that both ends are equal.
10. Do not add a band to this tassel. Go straight to cutting the loops at the bottom, but do not cut the 10" piece of yarn that ties the tassel at the top.
11. Grab your first tassel (the one with the band) and flip it upside down to find the center of the strings.

12. Use a needle to guide one end of the 10" piece of yarn from your second tassel through the bottom middle of your first tassel so that it comes out on the left of the knot at the top of the first tassel.
13. Use a needle to guide the other end of the 10" piece of yarn from the second tassel through the bottom middle of your first tassel so that it comes out on the right of the knot at the top of the first tassel.
14. Grab the two piece of yarn that you threaded through to the top of the tassel and pull them tight, to pull the second tassel firmly up against the first tassel. Double knot the two yarns to secure all pieces of your tassel together.
15. Trim the bottom of the tassel so that everything is the same length and looks cohesive.
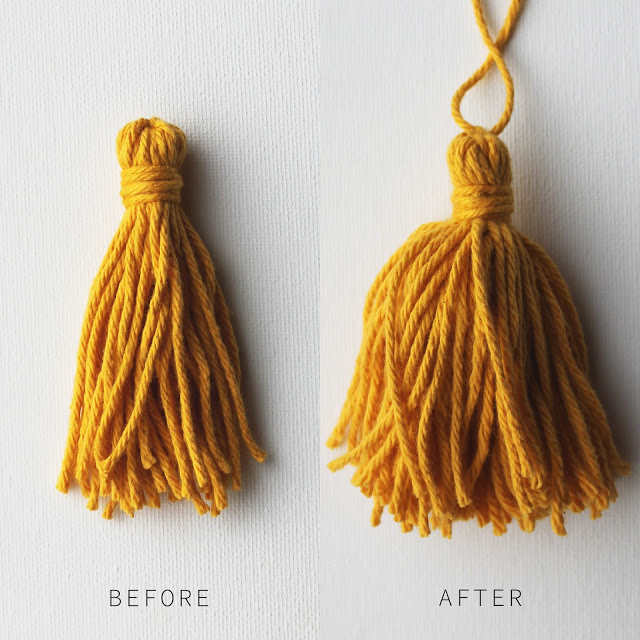
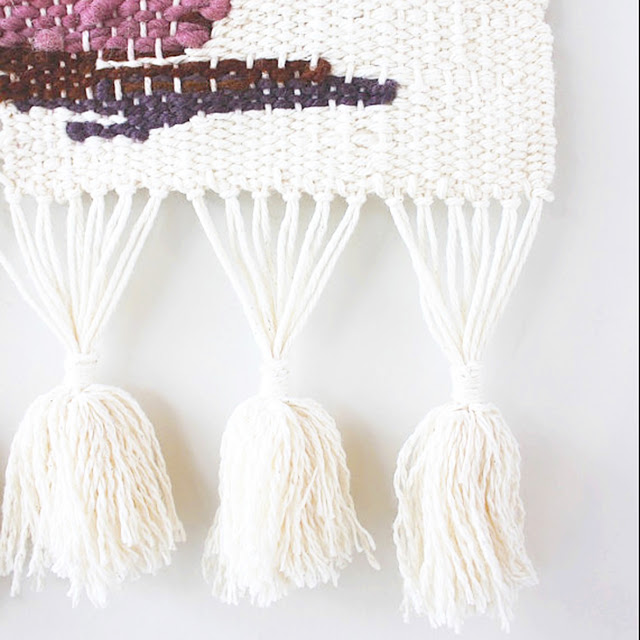
There you go! A fool proof way to cheat on your tassels so that they are full a voluptuous. I've used this technique on a couple of my weaves, including the one I shared above and the one below. If you use this technique be sure to tag me on Instagram @hellohydrangea so that I can see!